Using Unreal Engine to Render Toon Shaded Environments
Tags: posts, art, backgrounds, tutorial, unreal,
This tutorial is aimed at people with no experience with Unreal Engine who just want to render an existing model made by someone else. I'm very new to Unreal myself, and this is a bit slapdash, so I have plausibly gotten some details wrong.
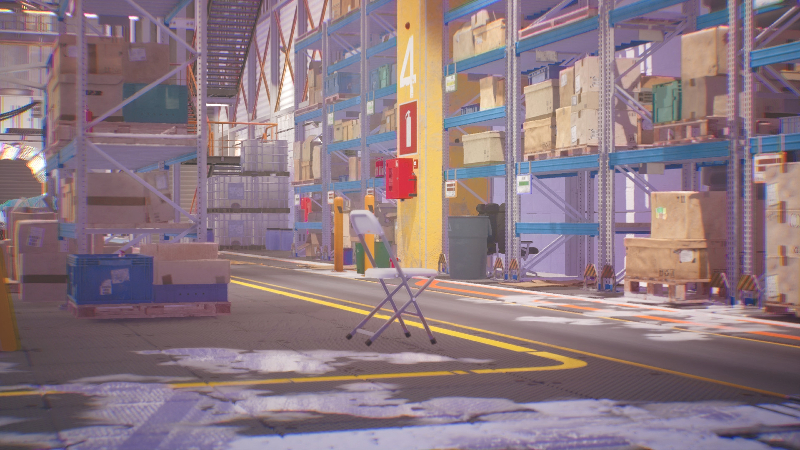
Here's an example render I made from Factory Environment Collection
: 
If you don't want to use toon shading and are happy with the environment's in-built shading, just skip the "Create an Unreal project containing a toon shader" and "Adding the toon shader to your project" steps.
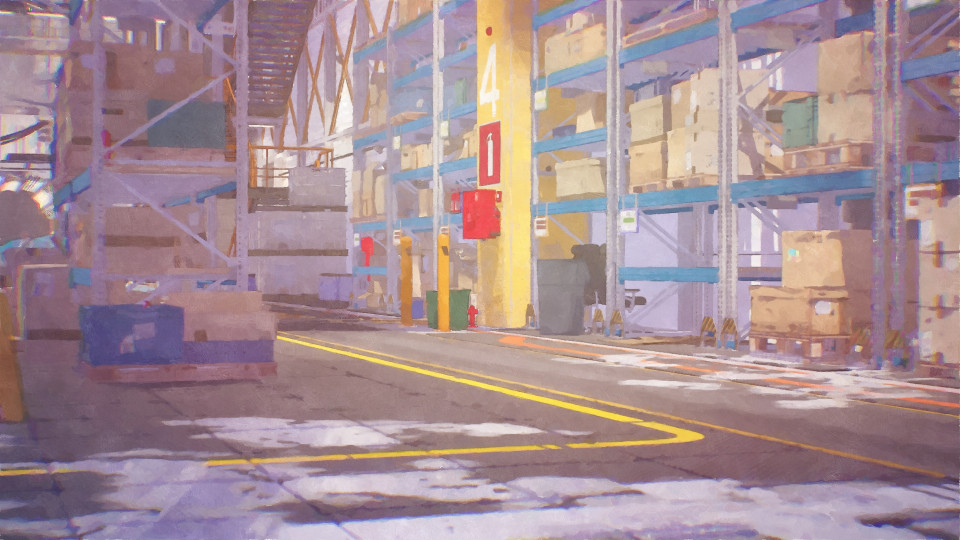
EDIT: Since making this tutorial I have started adding lines with Advanced Outline Shader for Unreal Engine 5, and then using fotosketcher to filter the results as described in Tutorial: Post Processing 3D Renders.
Here's an updated version of this background (I also removed the chair):

Setup
- Install the Epic Games launcher. A lot of Unreal content is controlled via the Epic Games launcher. Make an Epic Games account if you don't already have one.
- Install the latest version of Unreal Engine via the Epic Games launcher.
Optional: Follow any basic Unreal Engine introduction tutorial, just to get a feel for the controls. I followed Unreal Engine 5 Beginner Tutorial
Create an Unreal project containing a toon shader. Here's one I created, based on How to Make a Toon Shader in UE5.
Creating a project from an existing Environment
Choose an environment
Find an Unreal environment you like from the Unreal Marketplace (also accessible via the Epic Games launcher). I recommend checking out the Free For This Month section, it often has really good environments which are only available for a short time. You can theoretically download environments from places like Sketchfab, but importing them seems more fiddly.Create a project
Open the Library tab in the Epic Launcher and scroll down to the Vault. If your environment has a "Create New Project" button, just click that.If not, create a new empty project by going into Unreal Engine, clicking the "Games" tab and creating an empty project, then close it. Then click "Add to Project" on your asset and add it to the new project.
I'll call this project EnvironmentProject for clarity.
Setting up the project
Open your project in Unreal Engine, and open the Content Browser. There should be a pre-made level you can double click on to create a nice environment.Go to Edit -> Plugins and make sure 'Movie Render Queue' is enabled. Unreal will restart.
In the Content Browser, add a new subfolder of the Content folder called Sequences.
Remember to 'save all' every now and then!
Adding the toon shader to your project
Adding the toon shader
Go into the Toon Shader project. Right click on the folder and click "Migrate", then navigate to the content folder of the environment project created in the previous section.Setting up the toon shader
Open EnvironmentProject. Create a material instance of the Toonshader material.
Open the "Quickly add to the project" menu, marked by a little cube with a plus symbol. CLick Volumes/Post Process Volume. In the Details tab, set to Post Process Material. Clickl the + symbol and Choose Asset reference, selecting the toonshader instance. Click the Infinite Extent checkbox.
The toonshader should now be applied to your whole scene. Tweak the settings until you like how things look.
Creating a Render of your Scene
First step is to position yourself so you're looking at the view you want to make a render of.
Quick and dirty screenshot method
From How To Render High Resolution Image In Unreal Engine 5 THE FASTEST WAY!. Press G to hide the tools and widgets. Click the hamburger menu (three lines) and choose High Resolution Screenshot. Set the 'screenshot Size Multiplier' to 2 and click Capture. A link to your file will appear in the bottom left corner.Setting up a Level Sequence
This combines the techniques of How to Render Still Images in Unreal Engine 5 easily and This is the proper way to render an image on UNREAL ENGINE 5!.Right click and create a new Cinematic/Level Sequence, and give it a useful name eg FrontView.
Either click the Camera symbol to create a new camera with this view, or click +Track/Actor to Sequence to use an existing camera. Select the camera and tweak the position until it looks right in the preview window.
Optional: in the Details tab for this camera, set Focus Method to Manual and use the eyedropper tool to choose an object to focus on. Custom Clip Plane can remove objects in the foreground.
Rendering
Click the clapper symbol to open the render queue.Click on the (currently unnamed) preset to tweak the settings. If neccesary, change the output folder, filename, and resolution. Click the 'Use Custom Playback Range' checkbox and set the start frame to 0 and the end frame to 1. Click the preset name in the top right and Save Preset.
Click Accept and then Render Local.