Tutorial: Painting Trees in Clip Studio Paint
Tags: posts, tutorial, art, clip studio paint,
How to create new trees using the following Clip Studio Paint tools:
- "oaks.clip" and "lumpy brush.sut" from my Tree Cutout itchio project
- Bark brush (Optional, not used on these trees)
- Tree Brush 2 (has its own different tutorial)
There's lots of more detailed tutorials out there for painting trees in a traditional way. The aim here is to use preset colours and layers to create multiple trees in a consistent style. This technique was reverse engineered from Leaf Kim's gorgeous painted trees.
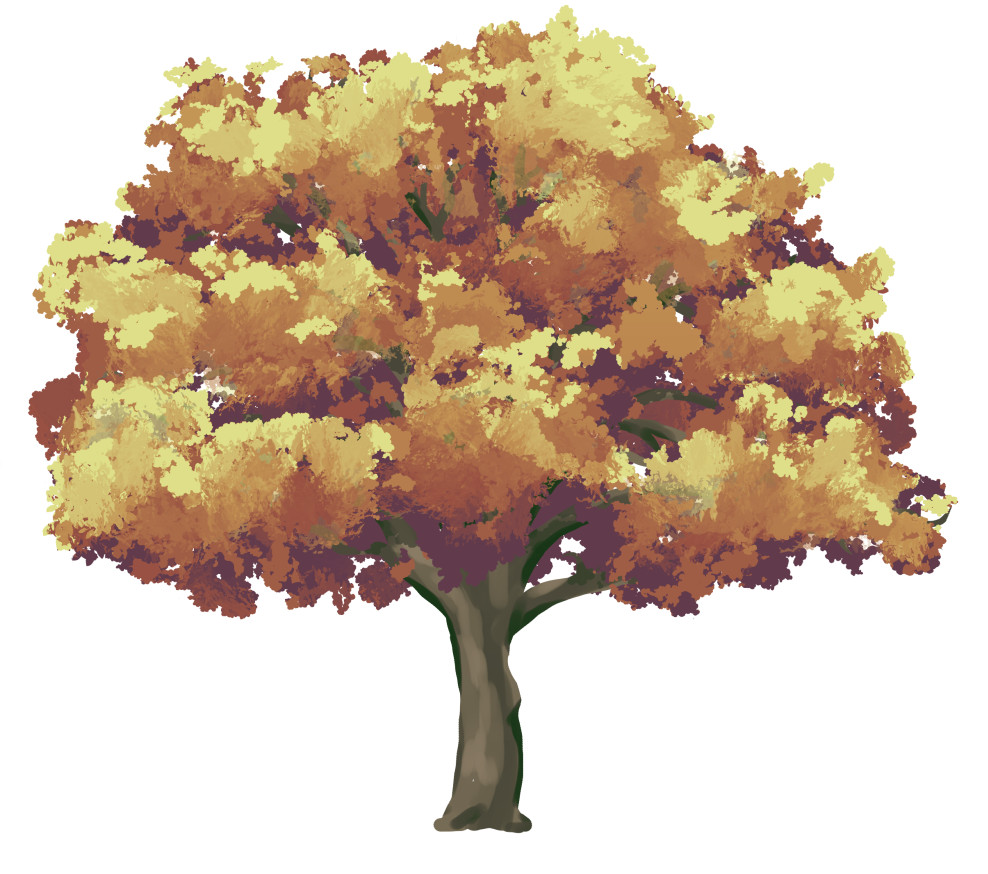
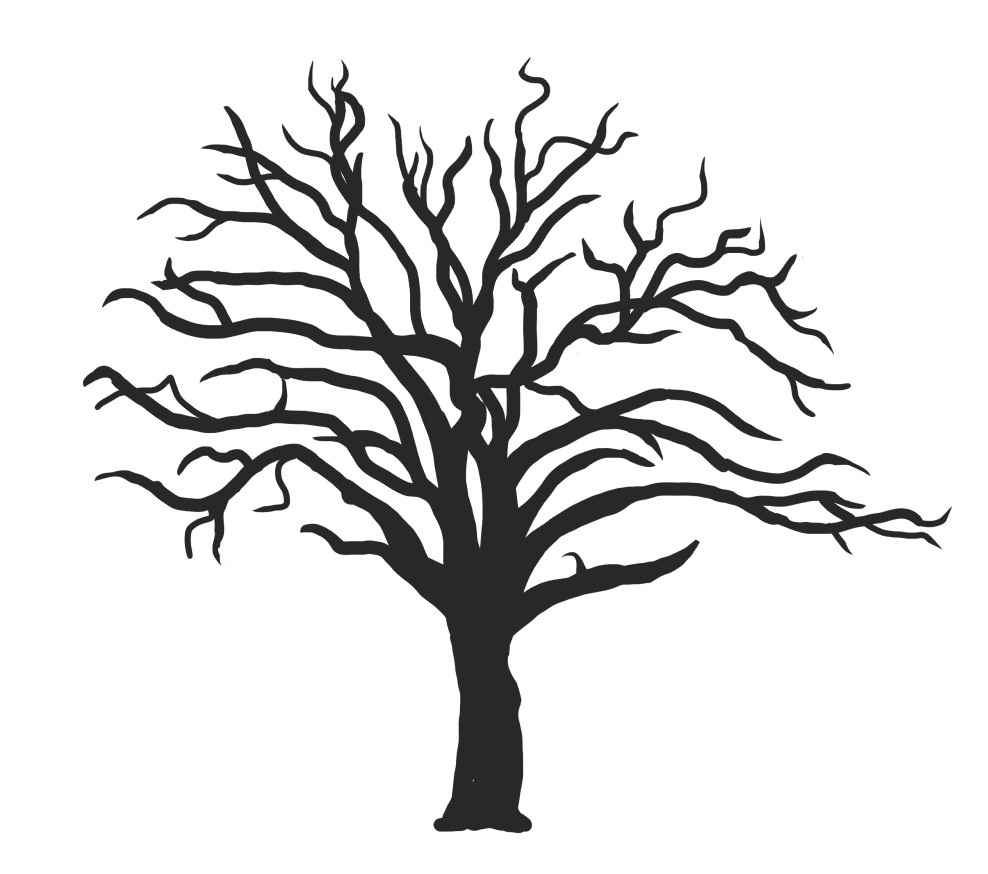
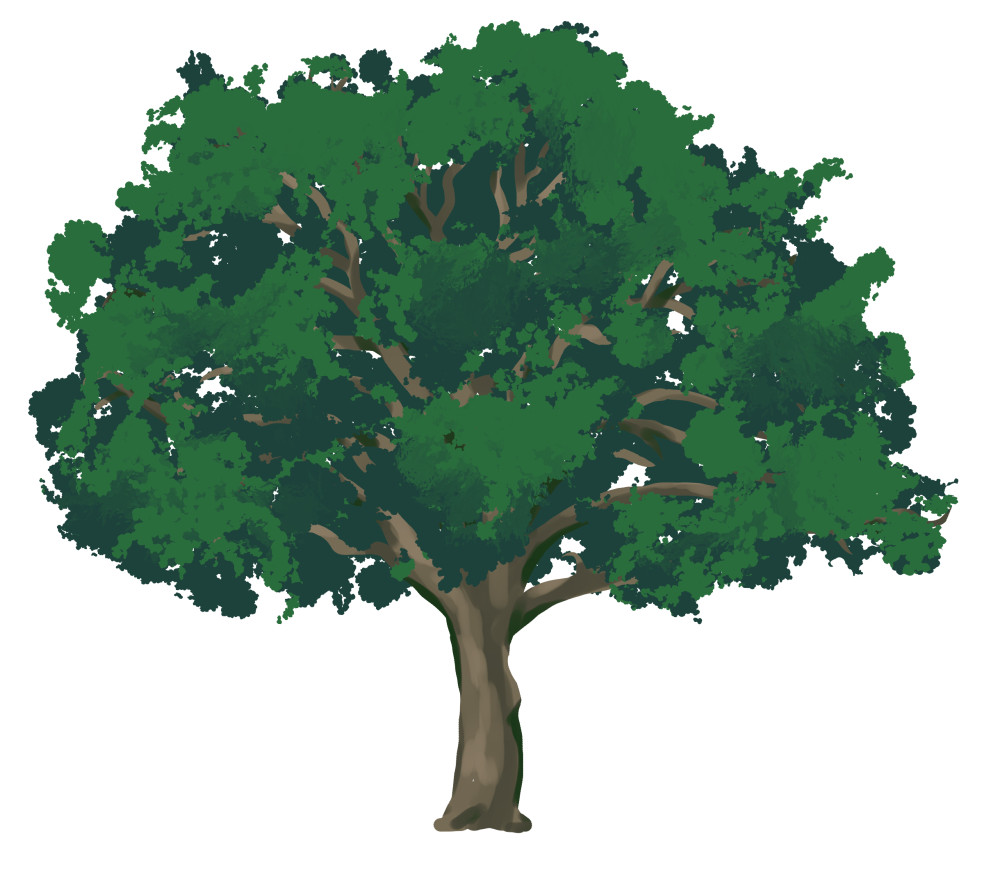
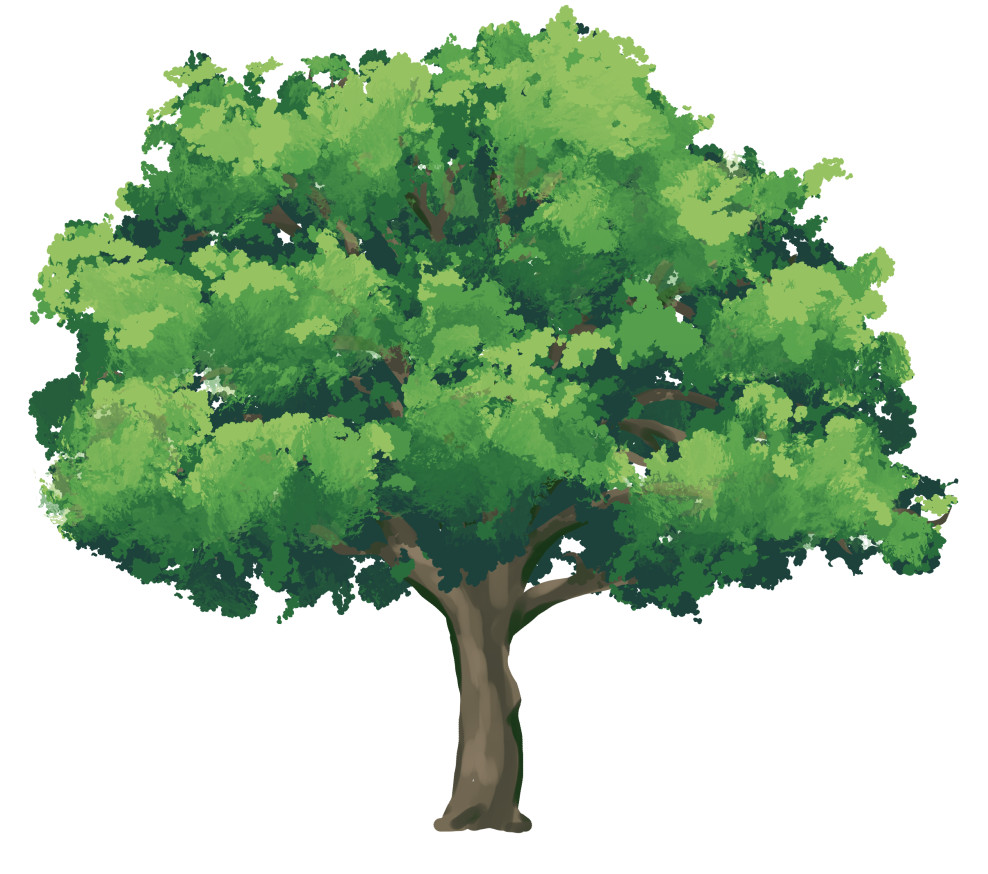
Here's the tree created for this tutorial, which you can check out in the "old oak" folder in "oaks.csp".
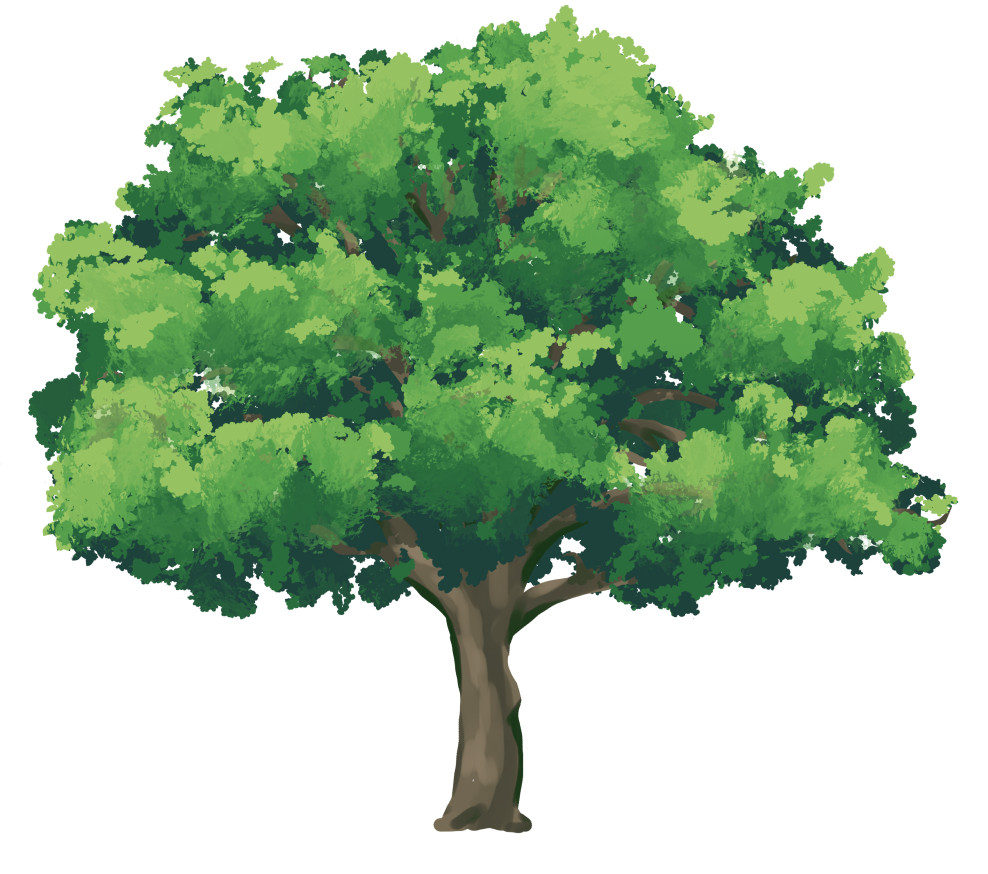
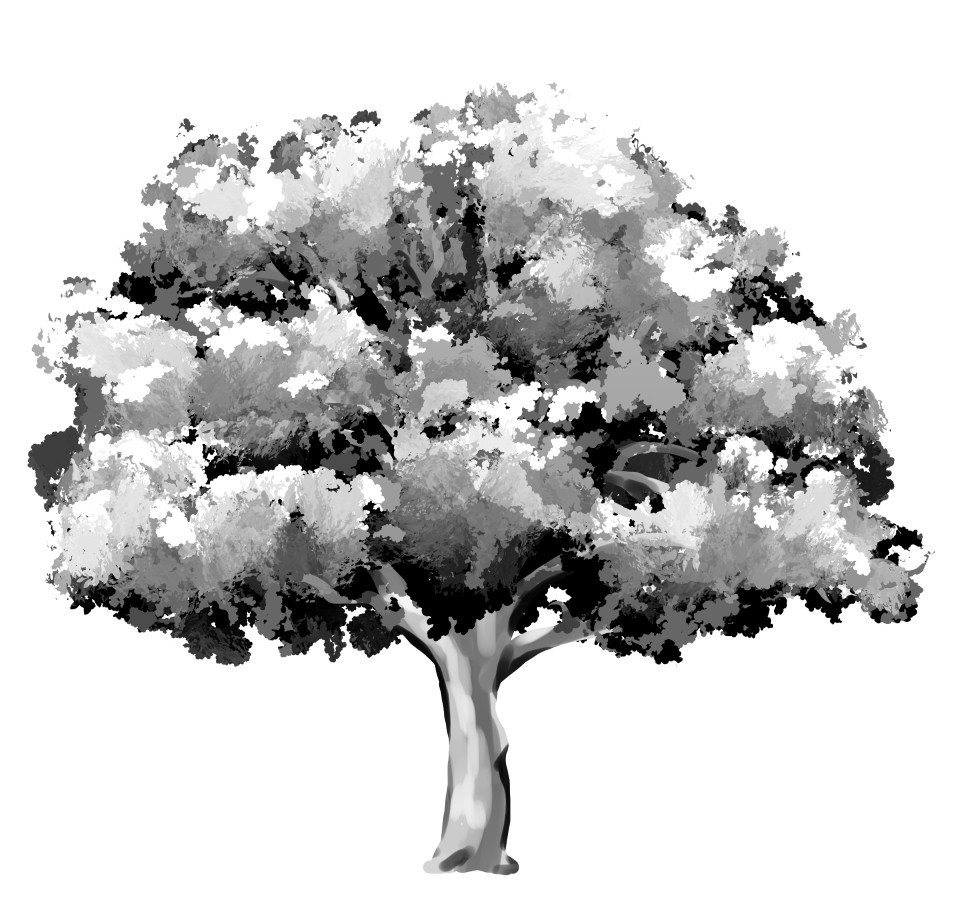
The basic idea behind these trees is to create a monochrome image for the leaves and bark, then apply colour via a gradient map. You can find the gradient maps used in this tutorial in the colour adjustments folder in oaks.csp.
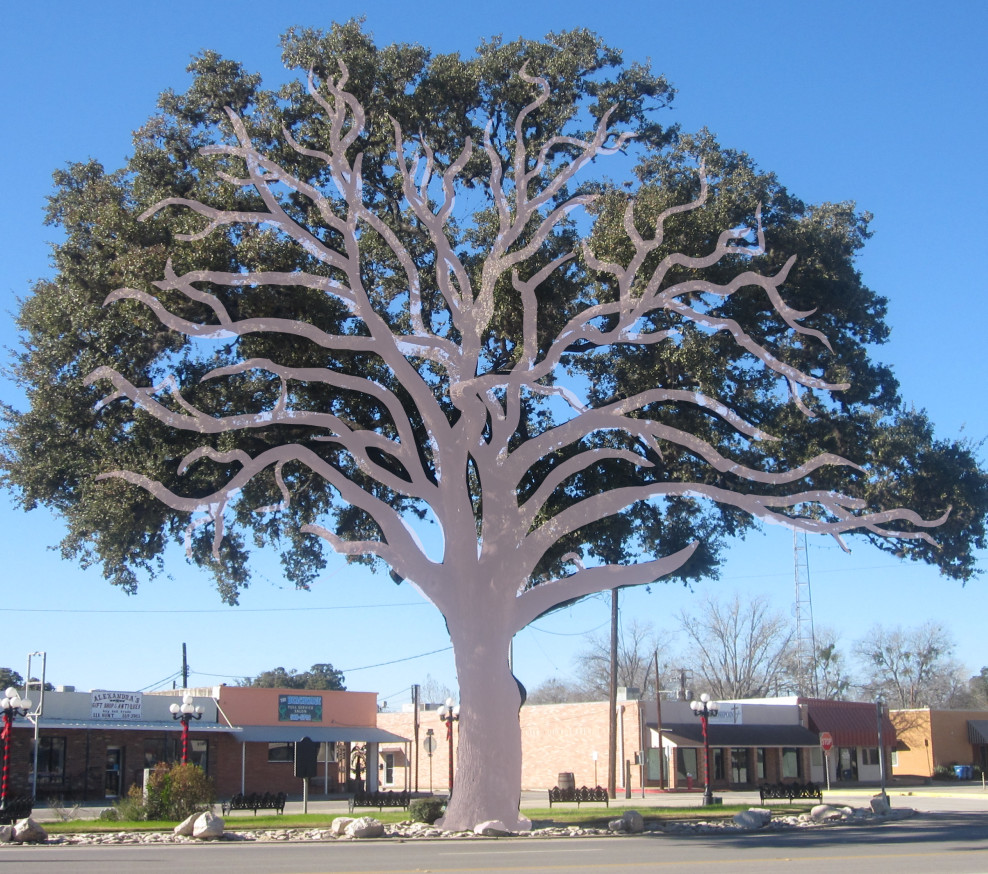
- So: to begin, find a creative commons tree photo you like the look of and scale it to fit the Clip Studio Paint file (2409 × 2288 pixels). I found mine on Wikipedia.
- Make a copy of the "blank" folder and rename it.
- Make sure the "bark gradient map" layer is disabled and the "change layer colour" button on the bark folder is enabled. Now everything drawn in the bark folder will look magenta.
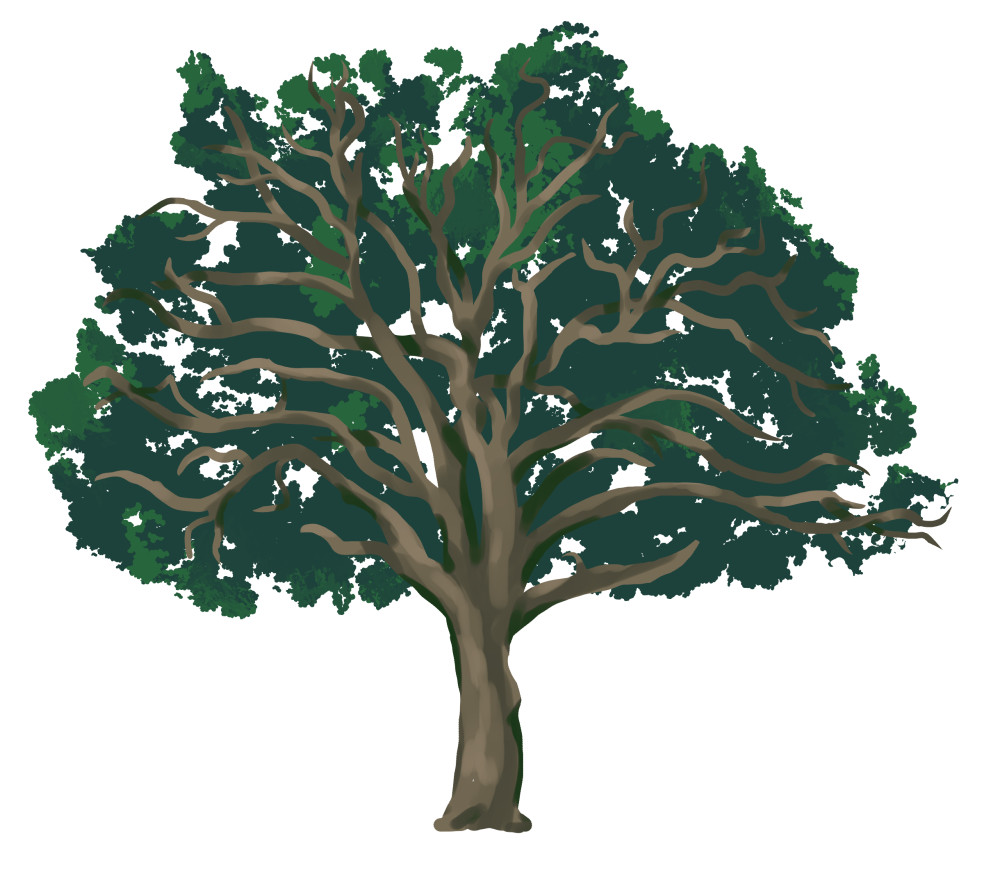
- Trace the branches of the reference tree roughly in black on the "Base branches" layer, without getting too detailed. I forgot to take a screenshot of how this looked before I started cleaning up, but it was uglier!
- Hide the reference image, and turn off the "change layer colour" button on the bark folder. Tidy up your branches. Each branch should end in a point.
- Turn on the "bark gradient map" layer. Paint the bark layers with a opaque watercolour brush. Create a sense of three dimensionality by deciding which branches are near the front and giving them more highlights. Those behind are darker, and get very dark shadows near where other branches overlap them. Add shadows to the branch tips.
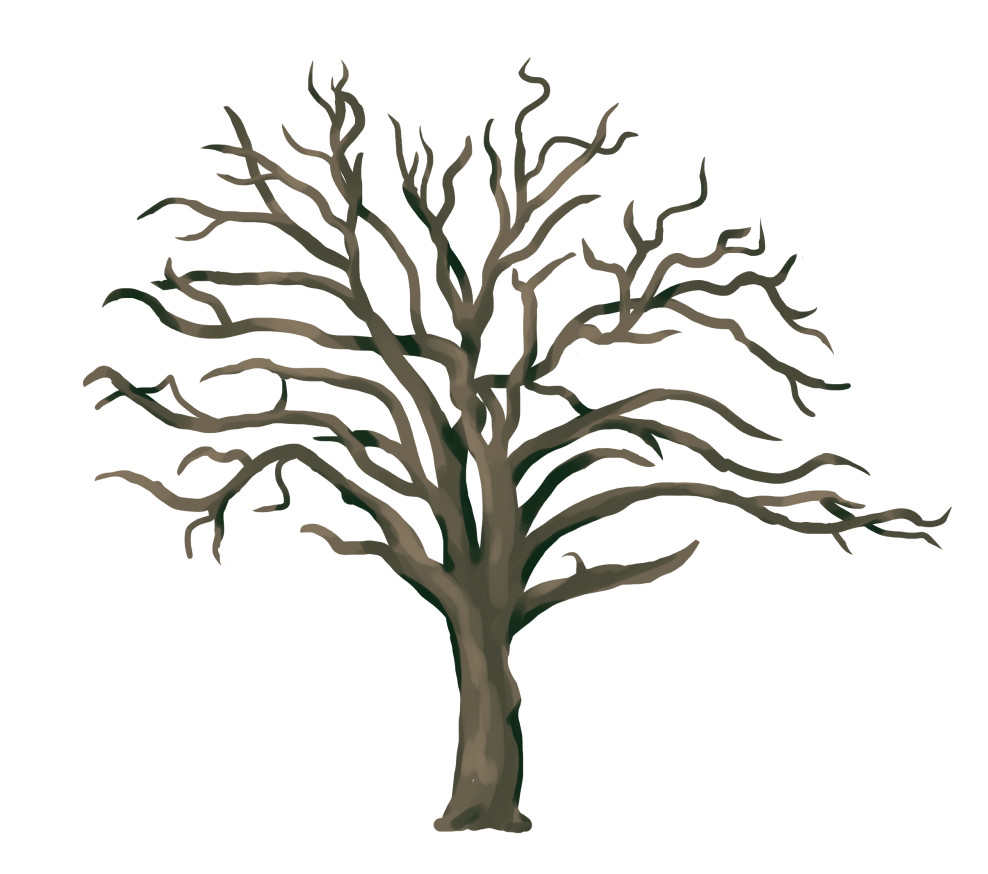
- Optional (not done in these images) Use the bark brush at 60% opacity along the shape of the branches to create bark texture.
- Block in "back leaves" with the Distant Tree Shadows 3 brush.
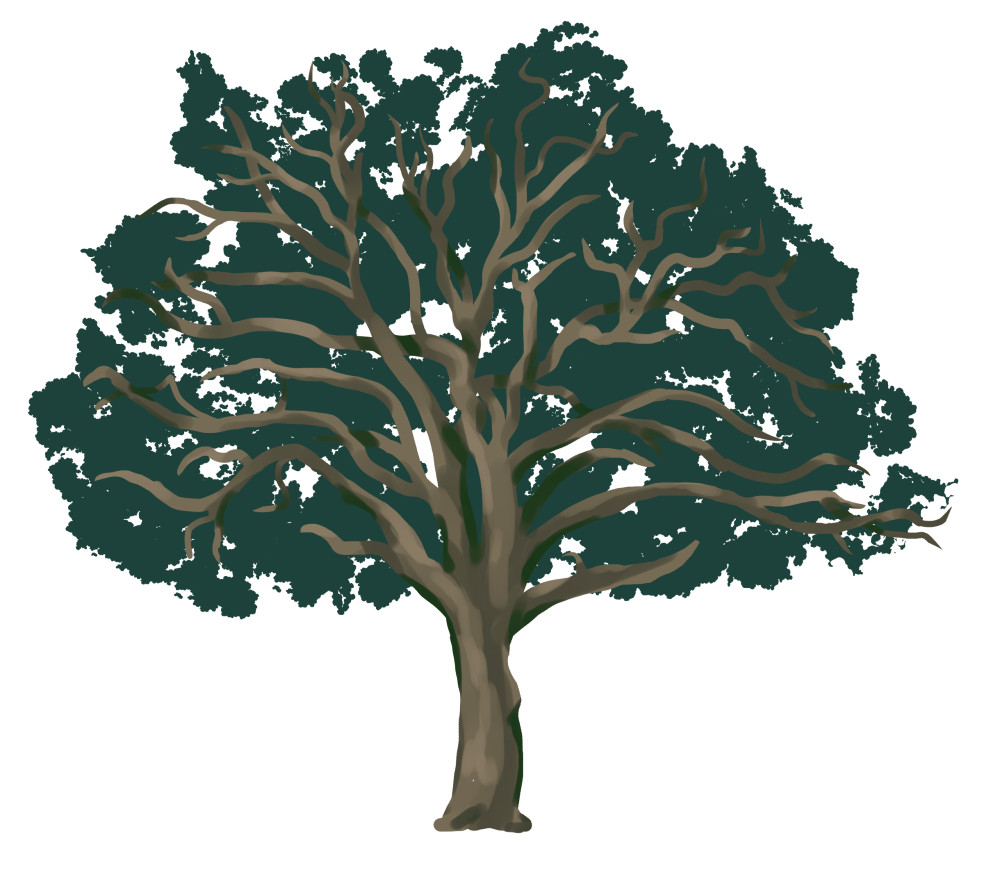
- Block in "middle leaves" with the Distant Tree Shadows 3 brush.
- Add "middle leaf shadows" with the Distant Tree Shadows 3 brush and then soften with the Fluff Blender brush or erase with the Distant Tree Shadows 3 brush.
- Block in "front leaves" with the Distant Tree Shadows 3 brush (I temporarily turned off the "front leaves gradient" layer to make the shapes easier to see).
- Add "front leaf highlights" with the Distant Tree Shadows 3 brush and then soften with the Fluff Blender brush or erase with the Distant Tree Shadows 3 brush.
- Add "top highlights" with the "Distant Tree Highlight" brush.
- Add little soft edges of colour to the "Back edges" and "middle edges" layers with all the Distant Tree Shadows 3 and Distant Tree Highlight brushes, softened with the Fluff Blender brush. This should mostly be along the top edges, but also anywhere with big areas that seem too shadowed.
- Add extra shadows to the bark on the "leaf shadow" layer using the Distant Tree Shadows 3 brush, wherever the bark should be shadowed by leaves.
- Tidy up the leaf layers with my lumpy brush.
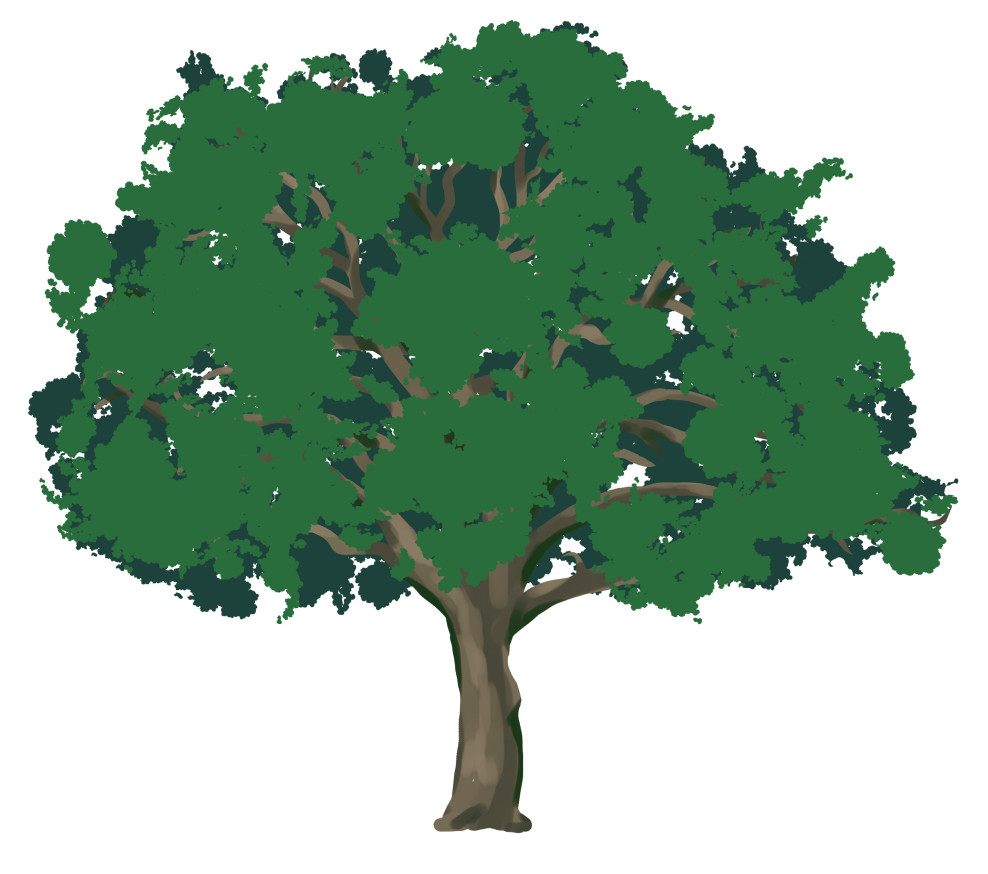
- Done!
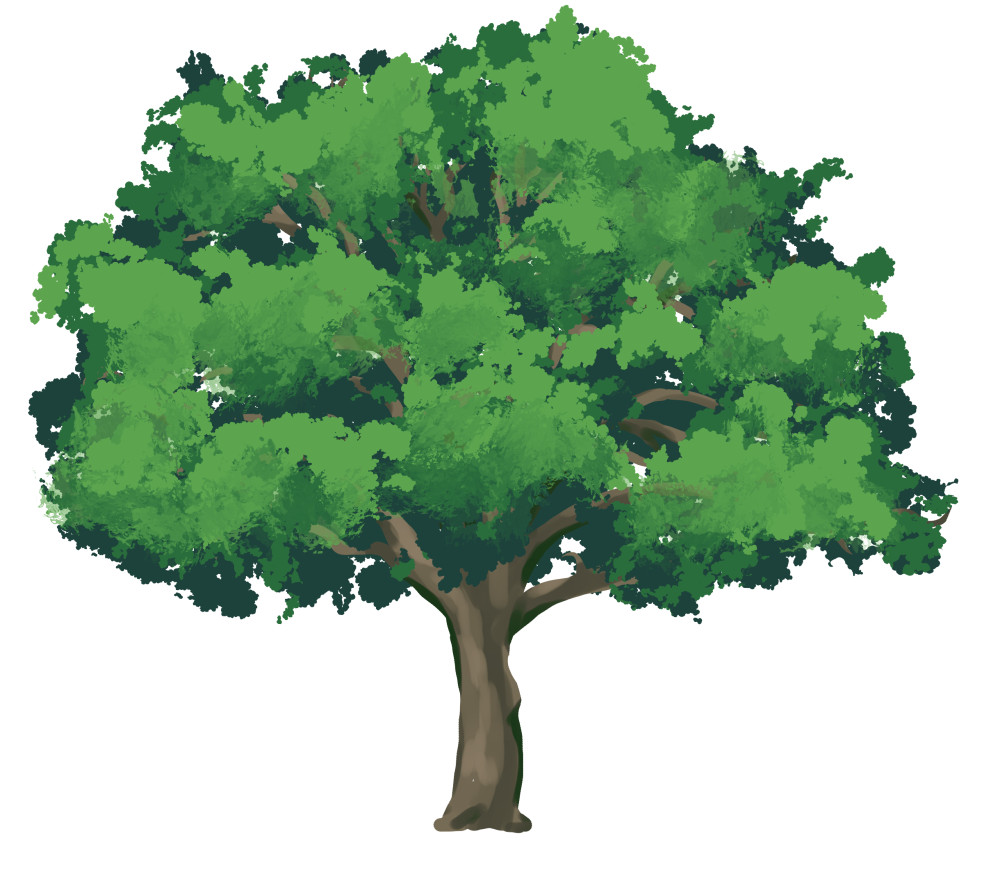
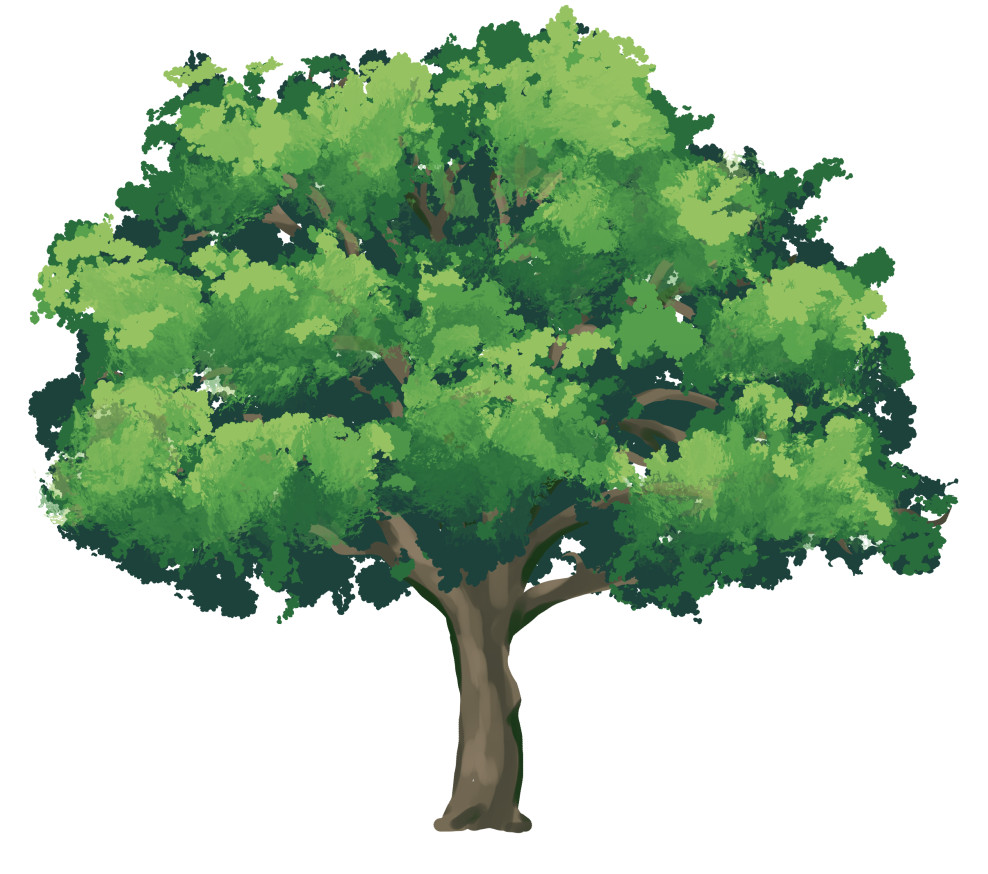
- To make colour variants, change the leaf gradient. For this autumn colour scheme I also added a slight hue change to the bark, see "medium oak" folder for an example.