Making A Low Res Environment In Blender
Tags: posts, tutorial, blender,
I was recently hired to make a low res environment and thought I'd write up/demonstrate the couple of things I learned in the process. There's a lot of cool tutorials on this topic and I have a lot left to learn! You can download the blender file and render at itchio.
Making the Environment
I downloaded a bunch of low res creative commons models from Quaternius (mostly the Ultimate House Interior Pack) and placed them around a room made of planes. Searching "loungeroom furniture layout" gave useful inspiration.
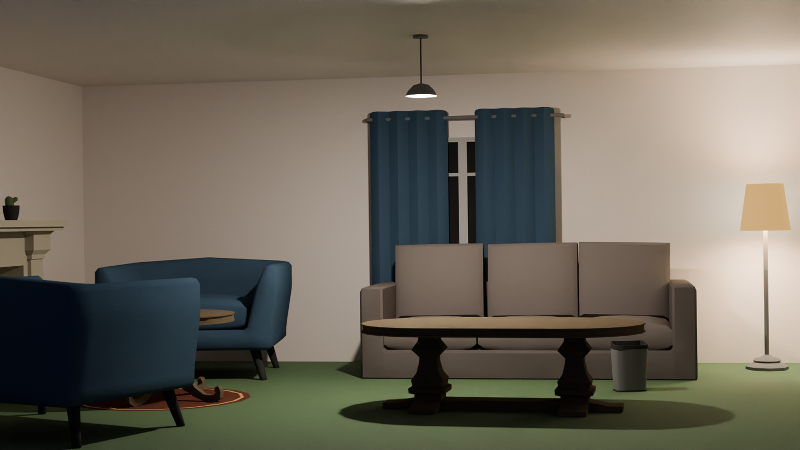
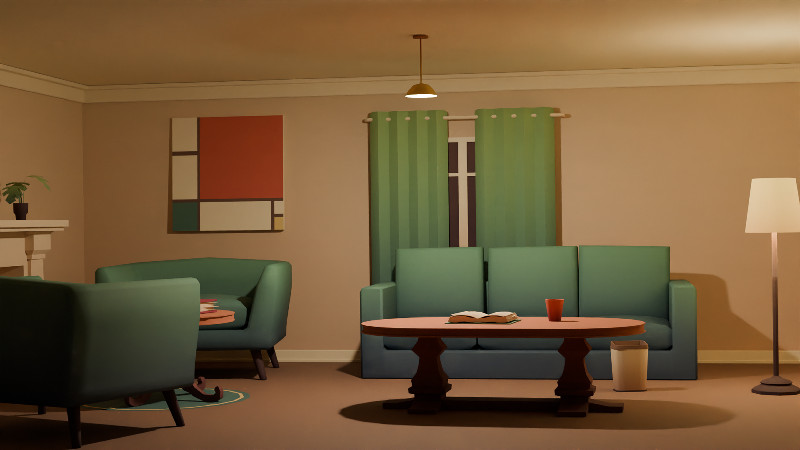
This is rendered in cycles with a couple of yellow-ish point lights.
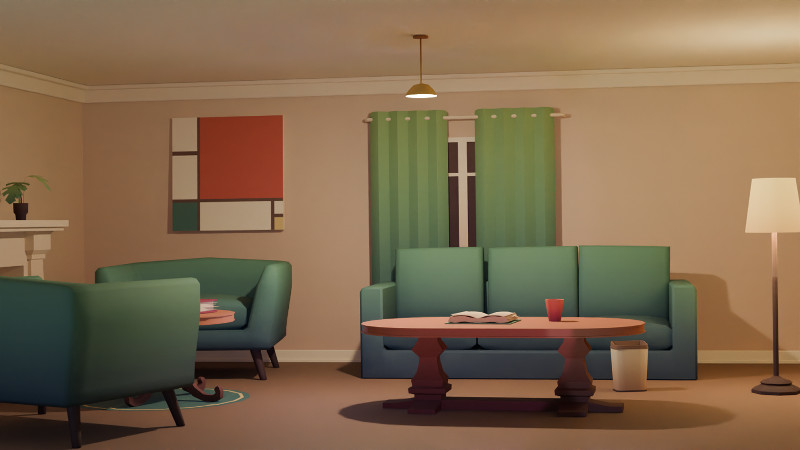
I watched some tutorials on low res environments and looked up loungeroom colour schemes. I tweaked some models, added extra details, and added more harmonious gradient textures. I also added a bunch of coloured lights.
Gradient colours
The simple surfaces of low poly models are particularly well suited to simulated shading created via a gradient. The simplest sort, used in this environment, is dark/cool/desaturated on the bottom and light/warm/saturated at the top.
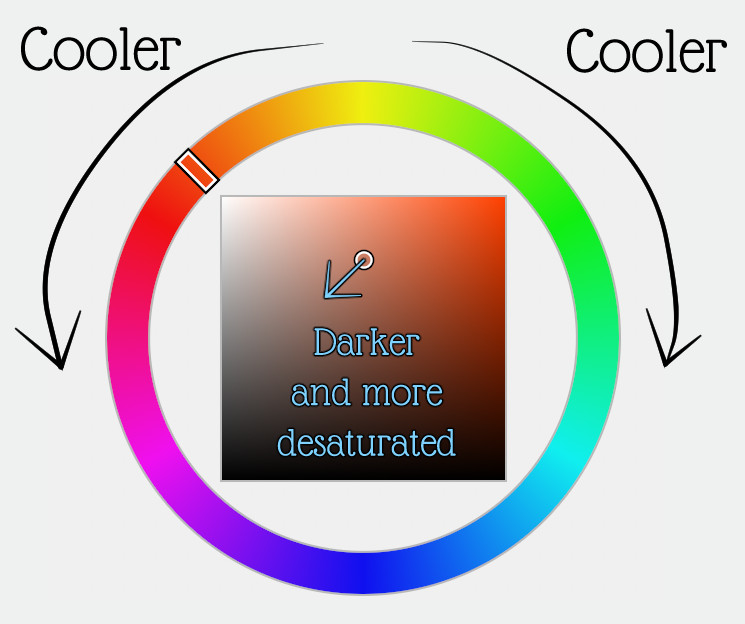
So a red object has dark purple-red shading etc.
For pure yellow I just try both orange-yellow and green-yellow shading and see which looks better in context, similarly for pure blue.
Procedural Gradients
This can be useful for tweaking textures even if you're eventually going to replace everything with image files.
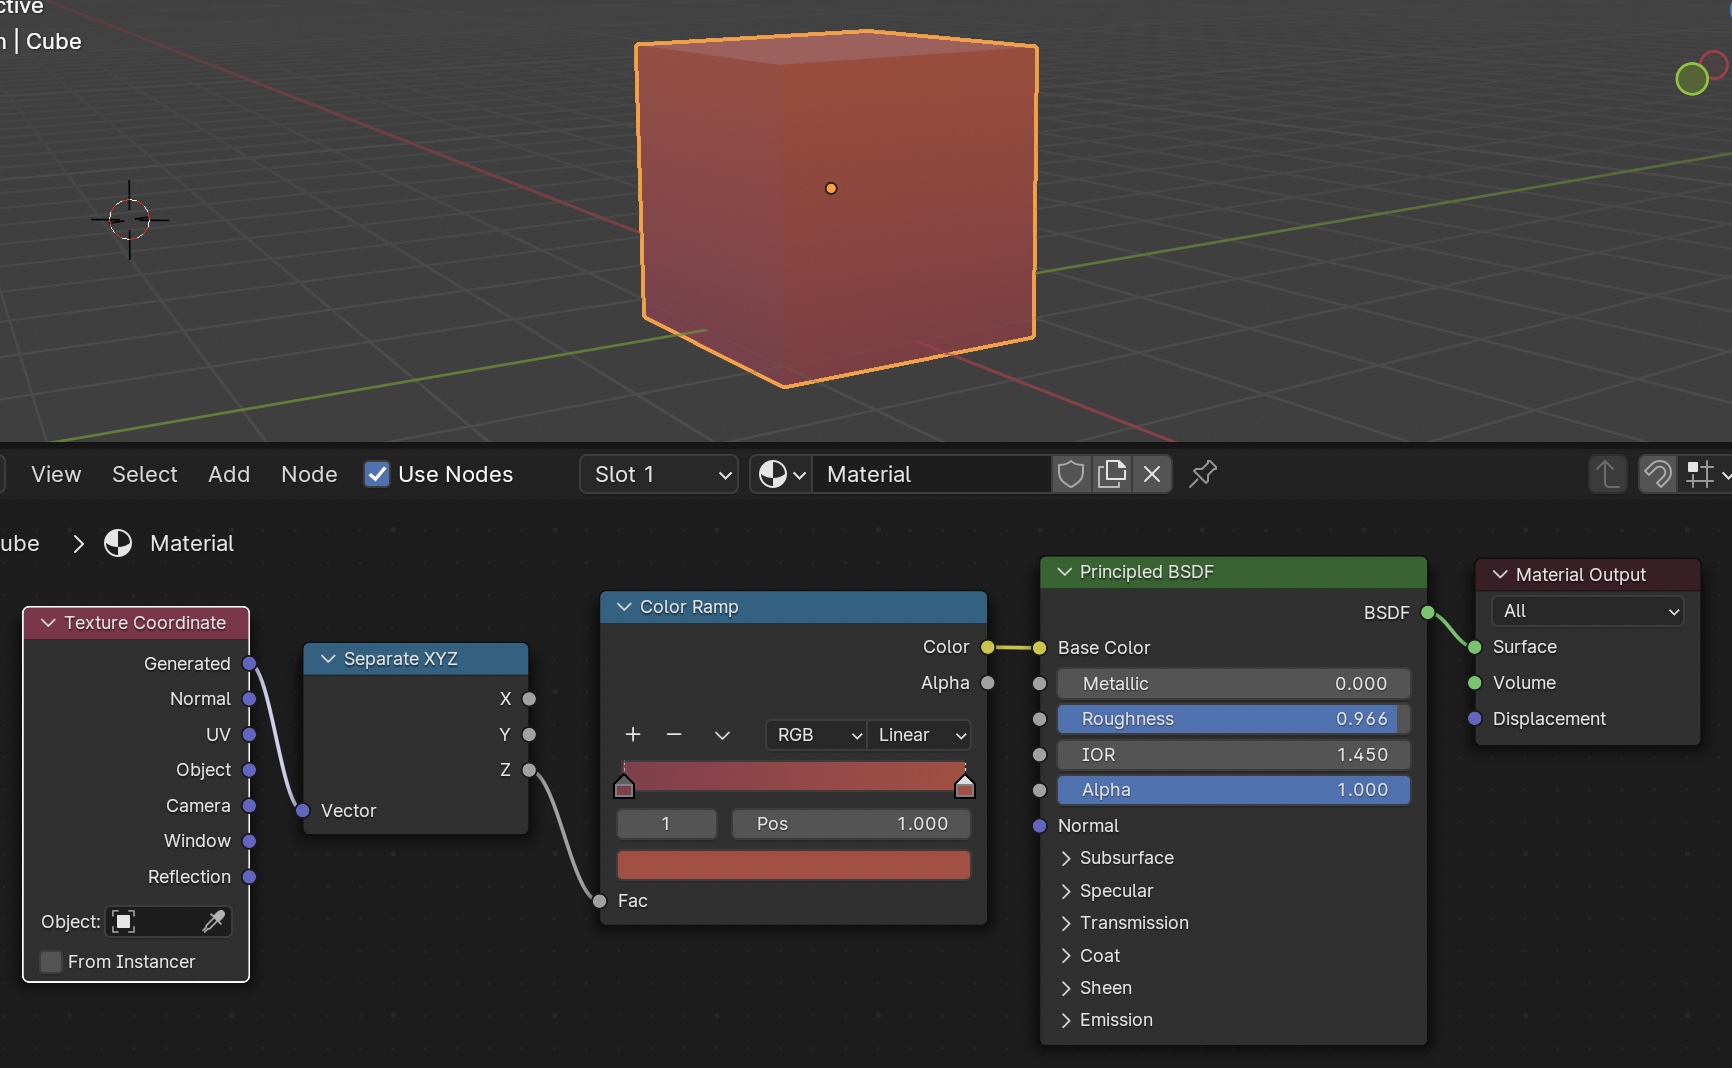
Take the coordinates from a Texture Coordinate node and separate out the z component (height) then pipe that into a color ramp using the sort of gradient described above.
Using a Single Material For Every Object
This is something you'd only do for exporting into formats like glTF for game engines etc, it makes the file much smaller and quicker to load but is a little fiddly. If I wasn't making my materials for export, I'd have used procedural textures instead.
I followed the technique described in Make Low Poly Models Look AMAZING With This Simple Gradient Trick!.
- Create/download a single image with every gradient you need on it, and create a single material piping it into a high roughness Principled BDSF node:
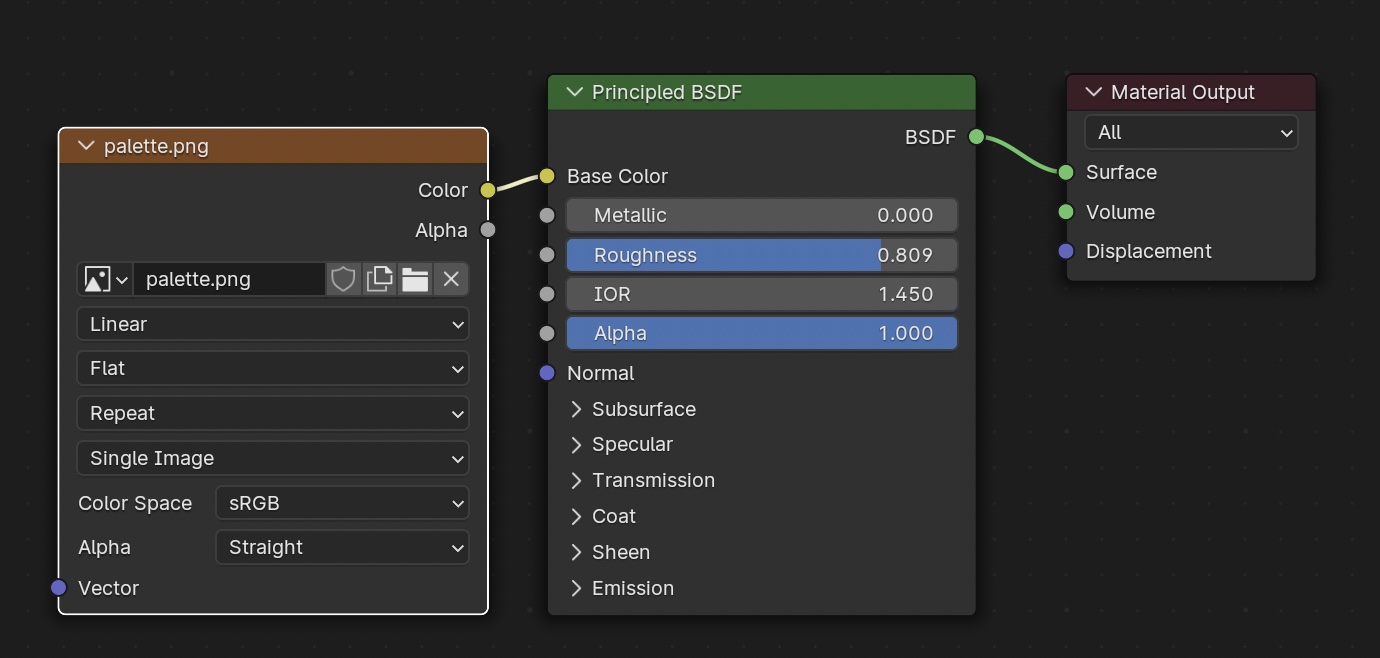
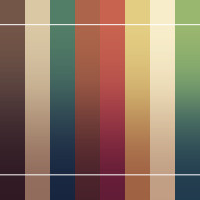
Here's the image I created for this environment. In retrospect it was a huge mistake not leaving myself extra room to add more colours later if I realised I needed them:
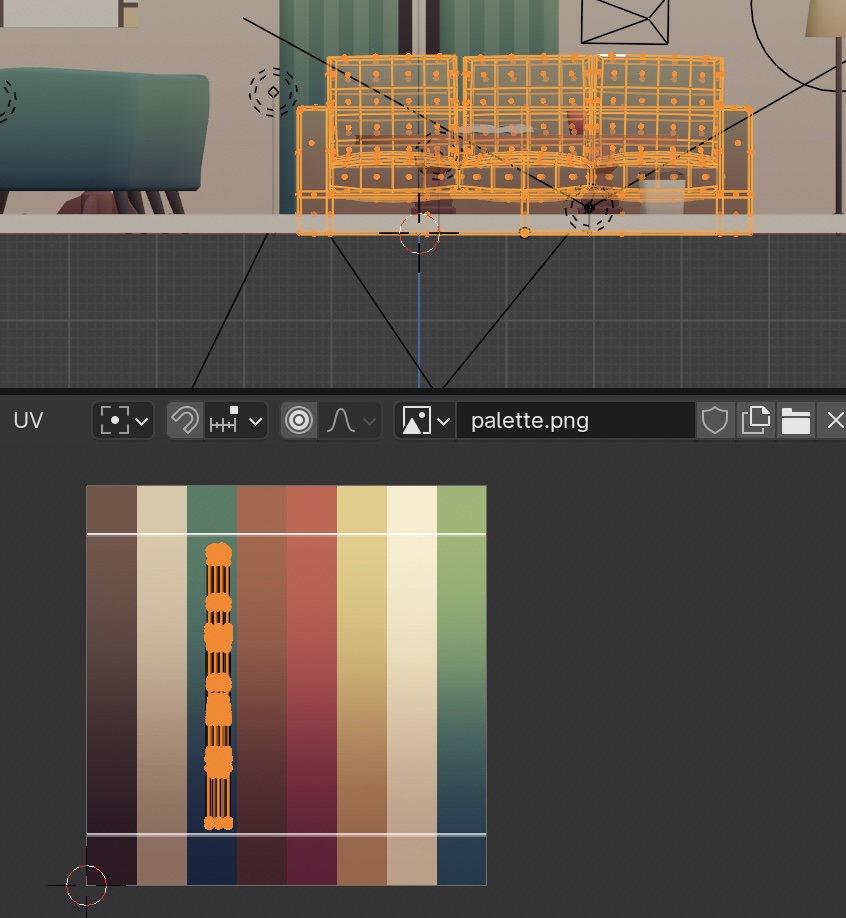
- Go into front view in the 3d viewport, and open your image texture in the UV editor in another window.
- For each object in turn, go into Edit mode and UV unwrap via "Project from View: Bounds".
- For every colour on the object, select the relevant vertices, and scale them in the UV editor until they line up with the correct part of your texture.
It probably would have made life easier if I'd assigned the vertices to labelled vertex groups. Next time I might just use a big texture atlas like Gradient Colour Atlas.
Rendering and Lighting
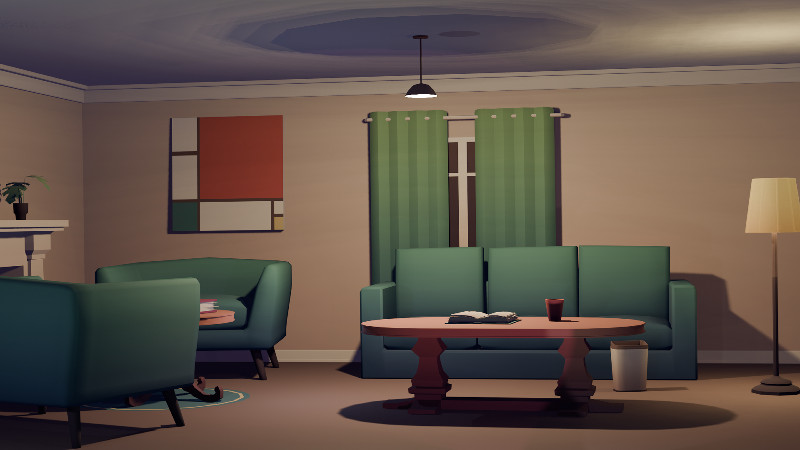
I again took a pretty simple approach since this was my first attempt at low res. I rendered in Cycles since that seemed closest to the kind of shader used in the intended final rendering engine (Ren'py).
Here it is with only a few yellow point lights:
Here's the same environment rendered in Eevee:
I tried compositing with the Ambient Occlusion as in The Secret to Stunning Low Poly Rendering, but while it mostly looked pretty good there were ugly weird artifacts on the ceiling light.